Monday, February 18, 2013

Valentine projects

I covered some large size candy bars for the boys with some MME patterned paper, stamped an AE stamp and cut it out, then created rolled roses from some scrap paper.
 
For goodie bags for the guys, I filled some plain paper lunch sacks, stamped doilies with an AE stamp, added some glitter heart stickers I had picked up at Michaels last year for .49, then folded over the bag and stapled the doily over it. I did something similar for Terri's kids, but forgot to take a pic.
My other project was a garland. I had found this canvas mini album at Michaels for $3 (minus a coupon, of course) and knew I wanted to turn it into a garland. I searched for some flowers that wouldn't overwhelm it, and settled on these felt roses from Hobby Lobby ($1.47 for the package). To help the letters stand out, I misted some doilies then searched through my chipboard letters. I didn't have the letters I wanted in either gold or silver glitter, and wasn't really in the mood to paint and stickle anything, so I searched my metal/plastic letters and was thrilled to get to use some more of my MM mailbox letters. (Oddly, when I bought them 7-8 years ago, I paid $6.99 for the set. When Michaels brought them back 2 years ago, when they were well out of "fashion", they were priced at $9.99 for the set and nobody bought them. Michaels is usually hopelessly out of touch with what's current in scrapbooking, with small flashes of awesome ness, i.e. the recent deal with American Crafts and Heidi Swapp). Some close-ups:
And finally, the boys have been asking for a cookie cake, so this is what I came up with. Not the prettiest, but it was pretty tasty.


Citrus Twist: Home is Where the Heart Is, LOAD 2/17-2/24

The sneak peeks of the January Citrus Twist kit made me nervous, since it seemed all I could really see was the Crate Paper chipboard accent sheet, the floral paper and the pink ribbon. Ummm..really not my thing. But...all together, I really kind of liked the kit and I ended up with 8 layouts, the most of any of my kits so far. And I'm still ahead on LOAD, because no one needed me this weekend. Really. Rick took over the bedroom/TV and worked, Brandon took over the living room/TV and played on the xbox between chores, and Jacob was content with his computer and an occasional bubble bath, leaving me to play. It felt weird.
 
The kit:
 
 
(February 17). When I first took everything out of the box, my eyes settled on the Dear Lizzy house paper and the Echo Park title strip. As I was playing around with it, I got the idea to cut out some of the houses and see what I could do with them. Then I thought maybe I could ground them with the pink ribbon. Then came the green swatch, and then the gray to tone it down a little. It was looking a little disconnected and very pink/green, so I used the inker on a new Ali Edwards house stamp and tucked them behind. I kind of like how they look. I don't do a lot of fussy cutting, or cut-out stamping, or even a lot of misting, so this was something new for me.
(February 18). This doesn't even look like something I made, right? LOL. I loved the floral pattern because it was just so pretty, but I never would have bought it because more than likely it would sit in my stash for a couple years before I sighed and gave it away. Being in the kit forced me to use it. This was a self-portrait I took with my ipod on my birthday, so that made the "theme" of the layout easy. The rose ribbon didn't come in the kit, but since it was sitting on my desk and matched, I figured, why not? If I'm gonna go girly, I might as well go really girly. :) I had taken out several of my embossing folders samples and was going to use the swiss dot one on some of the pink cardstock, but liked the white better and just used...my sample. Ooops. Sprayed it with some green glimmer mist, which I ended up really liking.
(February 19) Complete change of course! The green is seen in the first layout, but the stripe is the backside of the floral pattern and the red hearts is the backside of the teal days of the week page. I was waiting to figure out what I wanted to do with this photo, so once I opened my Silhouette program to look at my phrase/title options, everything fell into place. The "adorable" tab is left over from the CT November kit. I have a ton left and will be using them up forever, I think.
(February 20) This little quote card is also from the November kit and fell out of my baggie when I was getting the tab for the last layout. It reminded me that I had some Instagrams I had taken early on and hadn't even printed out yet, so I grabbed the blue chevron paper to add to the "blue" theme. Then I saw the "3" on the chipboard sheet and wanted to use it but had to find out ways to balance out the pink, so that's where the banner, washi and strip of pink patterned paper from my scrap pile comes in. The arrow was part of the stamp set and stamped with the chalk inker. I'm really loving those inkers.
(February 21) Another girly layout, can you believe it? The pale stripe paper is the backside of the Dear Lizzy house paper and I knew I wanted to somehow use it. I also knew I wanted to use some more of the floral chipboard pieces, so it just kind of evolved from there. I even used some MM ribbon from my stash :)  I tried to take an ipod self portrait each month last year, and it feels a little good to get a few pics of me in the scrapbooks.
(February 22) Not sure I like the monochromatic look. I was going for a no matter the time (days of week paper) or the place (strip of city map paper), we're still in love. The manila card is actually a February flash card; not sure why I don't really use them as they are. I had already completed my January PL pages by the time I got to this kit, so it seemed like a good base for my title, if nothing else. "Crazy" is from a Pink Paislee stamp set (weird story: I ordered it from 2peas last year, but didn't open it until a couple months later. When I did, I realized that the "newsflash" stamp was missing and had been replaced with a heart stamp and then the package was resealed. I guess somebody really wanted that stamp). And yep, I know my N is upside down. I wondered why it was upside down in my box, and after I stamped it I remembered that that stamp was manufactured upside down and I was trying to remind myself of that. Obviously that worked well!
(February 23) Still needs a photo! I want either a photo of the 4 of us or to make a Diptic collage of pics of us. Can't decide. Again, I wasn't thinking and used an embossing folder sample on the layout. Also used was one of the stamps from the Studio Calico January PL kit.
(February 24) I thought I was done, but this leaf pattern (the back of the green dot paper) made me think of birds. Which had me looking at the bird chipboard piece, so I printed out a pic from last spring (Rick yelled for me to grab my camera and pointed out a baby bird on our fence behind the garage).
 
Thoughts on this kit: I didn't expect to, but I really loved this kit and enjoyed working with it. This was really the first time that I played with misters, even though I have several from October Afternoon. And (insert embarrassed smiley face here), I actually liked it enough (especially the glimmer mist with glitter in it) that I used my Michaels 25% off everything coupon to buy 6 bottles of the Heidi Swapp Color Shine that they carry at Michaels now.

Wednesday, February 13, 2013

December Citrus Twist Kit, LOAD 2/10-2/16

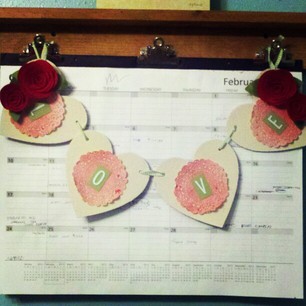
That's right, I'm ahead of the game! :)  I want to keep layouts that I do with a kit together, so since I'm going through kits right now, there will probably be a couple days delay in posting new layouts while I'm playing with the January kit.
 
The December Citrus Twist kit:

For December, I had either lots of photos (decorating the tree, opening presents, etc.) or single photos. It didn't seem like there was much in between. I also started using Instagram again, so a lot of the single photos were squares. I decided to use the kit for my single photo layouts, so I could "play" more, since I like the single smaller photo/lots of layering/clustering look but not sure how to go about it.
First up (February 10), the Best Quality tag was unintentional until I got to making the title, then it was kind of awesome, LOL.
Next (February 11) was my single lonely Memories in the Park photo. This one wasn't Instagrammed, just made into a square using Photosheet, since it wasn't that great of a photo. I was having trouble with putting something up in the right hand corner to balance the layout, and ended up grabbing the All is Bright (the name of that paper line) from the cut off strip and using a small tag to cover the designer's name. I think it worked well, but then I needed something blue on the right side to make a triangle between the blue felt flower and the blue in the background of the All is Bright. Enter the never ending roll of tickets :)
This one (February 12) didn't quite end up how I planned. "Celebrate Your Inner Elf" was a round shaped Silhouette cut, but I wasn't sure how to really separate and cut out the circle part and wasn't in the mood to play around with it, so I just moved the text around and then cut it out. My Silhouette did something weird, so it took awhile and I think I need a new blade already, because the "your inner" was very chewed up. As it happened, when I put the photo into Photosheet to print, it was put in sideways (I seem to have that effect of electronics), but I wasn't worried because it's a square and I could trim it. Anyway, I realized that since it was facing sideways, I could cut it into a Polaroid shape, which gave me a little mat for part of my title. After that, I just put "elf" on a tag to help it stand out, trashed the chewed up/ripped words, and stamped the rest of the title. I knew I was going to have long journaling, because I wanted to tell the story of why I do Elf even the the boys are older. I have no patience for learning how to do wrap around text boxes and figuring out spacing for them, so I tucked my paper in where I wanted it, created a light tracing with a pencil to give me borders, then typed it up on the typewriter. Easy peasy, took about 5 minutes. There really was no green in the kit (other than the washi tape), so I used some Coredinations cardstock, because I just really felt this layout needed some green. I used a section left over from cutting the title to use a My Favorite Things label tab die and stamping it with a stamp from the kit.
(February 13) I kind of wondered what I would do with this North Pole paper, and thought about using it with the pic of Jacob's last trip to Santa, but I had a large title I wanted to use with it, and a fair amount of journaling, so it would have covered most of the paper. As I was shuffling things around, I picked up this photo of Rick and me, which I had a different plan for, set it down on the paper, and "no one else in the world for me" popped into my head, and after that it was easy. Not sure I like the confetti stars in the corners of the mat, but they're on with glue dots, so they're likely to stay. I just noticed that at the bottom of the photo mat, the sideways 8s on the tag look kind of like an infinity symbol, so that totally works for me.

February 14 - I knew I wanted to use this photo with this kit, and on the first pass through, I knew I wanted to use this collaged paper for it. That was pretty much all I knew. The woodgrain and blue looked pale, and it didn't really stand out from the background, so I added the red strip, but then it seemed bottom heavy, so the only other red I really liked with it was...the packaging from the Pink Paislee City Sidewalks tags. I was able to scoot it down far enough to hide most of the packaging text.  As a bonus, it's long enough to create more of a base for the other patterned paper. It still seemed blah, so I bordered it with strips of the blue cardstock, which I liked, so I threw in the blue felt flower to keep the blue from looking so random.
February 15 - Since it was a phone pic, my starbucks pic didn't get printed with last year's Christmas photos and I had forgotten about it. I still had it, and still wanted to scrapbook it, so it seemed fitting to use the red snowflake paper for a coffee layout. I didn't figure I would use the larger, ornate rectangle tags from the Pink Paislee set, so I flipped them over and used them as a base for my stack of stuff. I had no plans for the December calendar card, and I had already completed my PL pages, so I tucked it under the photo for interest and ended up using it for my title. I used a scrap of green to balance out the green in the photo and used one of the stamps for my subtitle: NEWSFLASH: I still don't like coffee.

February 16 - I had the idea for this layout ever since I saw this phrase cut in the Silhouette store. Since Christmas is the only time I like to shop (well, other than for scrapbooking supplies), I wanted to document that, and since I had this random pic of me (I try and take a self portrait each month for PL), I figured why not? The vintage image is from the October Afternoon Make it Merry kit I bought myself for Christmas. Again, journaling was very easy, thanks to my typewriter.

Thoughts on this kit: Loved it, although I have no idea why there was bright green washi tape, since it was pretty much the only green (other than some trees on one piece of paper) in the kit. It almost seemed like an afterthought.

Project Life, week 4 and LOAD 2/9

Ahh, back to sunny and happy! This week's paper pad: Pebbles Seen and Noted.
 
 Using the Recollections page protector for the previous week worked out ok in that I ended up with another vertical pic of Rick I wanted to keep as a 4x6. It also gave me a place for his jury duty summons.

 
Also used: SC PL cards, a Seafoam card, and a Recollections/Pebbles journal card.

Project Life 2013, week 3 and LOAD 2/8

This week's paper pad: Pink Paislee Portfolio. I'm not real fond of this week. Kind of blah and pale, which fits the week. I had a vertical pic that I wanted to use as a 4x6, but didn't really have enough for the week to need an insert, so I dug through my crazy stash of page protectors and chose one from Recollections. I thought that I could maybe do a Simple Stories border cut in the middle, but the way the page protector is manufactured, part of the opening is closed off, so you have to trim any piece of paper you put in there much smaller than what you would think. So, just some cardstock with washi tape.


Seafoam and SC cards.

Project Life 2013 week 2, LOAD 2/7

This week's paper pad: Basic Grey Fiction, from the Fact/Fiction dual line available at Joanns.


Also used: some of the leftover alpha stickers from the November CT kit, PL Seafoam kit, and I spy a SC PL card, as well.
 

Citrus Twist, November 2012/Layout of the Day/PL2013 week 5

Well, that was a mouthful! I hadn't really scrapbooked regular pages since the crop in November, and really the only other stuff I had done at the Ditch the Kids crop were my December PL pages, so I decided to jump right in with my Citrus Twist kits while completing a Layout a Day (LOAD) challenge. I didn't sign up for the actual challenge, since I didn't feel I needed a topic prompt to get me going.
 
This was my November Citrus Twist kit:
 
My first layout (Februrary 1): the little "if dreams were wishes" card made me think of how we always joke that we'd buy a house with a Teton view if we won the lottery. I found some great pics on Google and printed them as 5x7 and built my layout around that. I knew I wanted to use some of the blue paper, and the various shades of the cardstock played of the pics well. (That sunset pic is now my computer background.)
My second (February 2) layout used the green ledger paper as a background for our one Thanksgiving picture. The journaling card is actually the product backing from the Amy Tangerine 3D elements.
My third layout (February 3) was a relatively easy one. On 12-12-12 we wrote down our favorite 12 moments from 2012. I thought maybe I would use the December kit for that, but the library card paper seemed like a fun/easy way to journal it. Took a couple minutes on the typewriter. The title was my first non-practice/playing cut with my new Silhouette machine. The font is Lobster 1.4, downloaded for free from the internet.
My fourth layout (February 4) was very picture heavy. I knew I wanted to use the airplane cutout on a travel page, and we had recently been talking about the places we still wanted to visit, so the Wish List page was born. Again, pics are downloaded from Google. (For the record, on the left page they are Caribbean cruise, Mexico, Outer Banks NC, Germany, Niagara Falls, Chicaco. On the right side: Oregon Coast, Hawaii, Savannah GA, London, Williamsburg VA and Boston.) There are more, but those were the first 12 that came to mind.
Fifth layout (February 5) was inspired by several of the pieces of paper being from the Crate Paper "Acorn Avenue" line. We were inundated/attacked by acorns all fall. There were days when I walked Jacob to the bus when I wished I had an umbrella. The pic just shows acorns from the roof right about the door. The really was no thought process on here, just moving and layering pieces of papers of paper until I liked it. I even cut out one of the "Acorn Avenue" images from the cut off strip to use on the journal block.

And Project Life 2013 week 5:


I still had a decent amount of paper and stuff left, so I used it for my PL2013 week 5 spread (February 6), since it seemed to match the colors. There are also some Clementine, Turquoise and SC PL cards mixed in.
 
Thoughts on this kit: Overall, I liked it. Acorn Avenue wasn't on my to get list, and except for the blue geometric print, Studio Calico Yearbook wasn't, either. It was a fun kit to play with. I wasn't real fond of the washi this time, but managed to use it a few times, and the Prima inker (Fall Leaf) didn't get much use, but it will on other projects. I still have a decent amount of paper and embellies left over.


Project Life 2013, week 1

Another year of PL. I originally thought I would do a monthly grouping this year, but I realized that I liked the picking of a 6x6 pad each week, so I decided to continue that. Also, back in October I signed up, sight unseen, for the new Studio Calico PL kit, co-branded with Becky Higgins. I really love the cards, stamp set, and even the alphas and washi tape. I loved the style and most of the cards, but there are a few problems. First, the corner rounding was kind of wonky. That didn't really bother me too much. The bigger problem is that the cards are all different sizes. Some are small enough to be jiggly in the BH protectors. Some are a tight squeeze. Others are too big and have to be significantly trimmed to get them in the protectors. Hopefully they address that problem.
 
This week's paper pad is Dear Lizzy 5th and Frolic, a line I originally thought I wouldn't buy. It grew on my, and in the end I bought the 6x6 pad and a packet of embellishments.


Project Life, week 52


 This week's paper pad: Echo Park This and That Christmas, which ranks right up there as one of my favorite Christmas lines, and this is probably my favorite PL spread of the year.
 
 
with the Elf on the Shelf insert on the right.


and with the insert backside.
 
most of my pics for the week were vertical, so I printed them as 3x4 and lined them up along the middle. Just something a little different.