I love just about every collection from Echo Park, and even though I said I wasn't going to buy any more Christmas paper last year, I snapped this up as soon as it came in stock at Archivers.
 I (and my overloaded box of Christmas paper) decided I would try and do as many of my Christmas layouts with the paper kit as possible. As usual, I did not buy any "extras" from the line (brads, chipboard stickers, etc.). For some reason, I did buy a second sheet of the small print poinsettia paper, as seen below.
 I added a flower from Hobby Lobby and a small sticker from Bella Blvd.
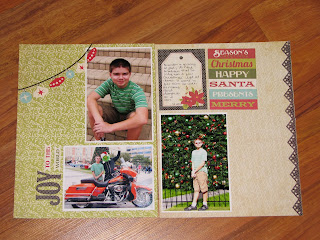
 The red strip is the backside of one of the above sheets. I added an old MME frame and some lace from Hobby Lobby. Brandon was goofing off with the camera on the last shot, and of course it ended up being the best one. There was no real way to edit it, so I used it as is.
 I love these stickers from HL, but they are a pain to get off the backing sheet and apply. I stamped an AE stamp around the edge of the white paper in alternating Jenni Bowlin inks. Under the tree photos is some white paper edged with a Fiskars punch with a little bit of green rick rack thrown on for good measure.
 I think this was my least favorite one of the bunch. I worked on moving stuff around and different papers for over an hour before settling on this. Not great, but passable.
 The Toys for Boys and Girls sticker was an easy choice :)
 Printed the photo as a 3.5 square in Photosheet, so I trimmed it to look like a poloroid. Extra package sticker is from Michaels. May go back and print out the Archivers logo to put on the brown bag.
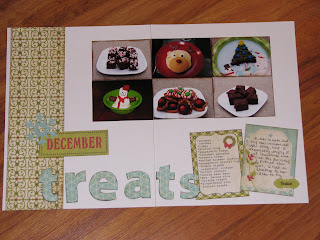
 I guess it was a good thing I didn't start Elf on a Shelf until the 6th...used a 2.5 inch square punch to punch the pics. In hindsight, it probably would have been easier to make a collage on the computer, but I had already printed the pics.
 I wanted blue letters but didn't have any big enough, so I had the bright idea to cover chipboard with some of the paper. I made it a little less time consuming by covering the front of the letters with double stick tape and then laying them face down on the paper, rather than trying to modpodge them. Eliminated the mess and the drying time.
 I actually intended to use the paper on the other side of the plaid, but when flipping it over to add adhesive I liked it better so I called Rick in to choose, and he chose the plaid. The only thing not from the kit is the flower from HL.
 I had printed the smaller pics as part of a sheet from Photosheet, but only 3 were for Christmas, so I had to decide how to use them. I like how the banner turned out. This was the last full sheet of paper other than the striped one that I had been cutting strips from. Doodlebug twine.
 Cut strips from the hexagon paper to "frame" the pics. I liked the subway art sticker from the pack, but it was 1)black and 2) referenced snow, so I used the letter stickers to mimic it.
 I liked the mini bingo sticker, but it didn't really stand out from the pattern paper, so I found a scrap of black in my scrap tower. I like it, it kind of reminds me of a Santa belt buckle.
 I thought I was done and then remembered I hadn't done a page with our Christmas card yet, so I started moving around what I did have left and ended up with sort of a mish mash. After 13 layouts this is what I had left from the kit:
 I didn't want to add a bunch more paper to my scrap pile, so I cute the two strips that were almost 6x12 down to make 4 4x6 cards, took out the journaling cards, and then used some of the leftover strips and stickers to make a set of journaling cards. Now I have a Christmas-y set ready for Project Life in December.
365 Layouts total: 108 layouts and 3 mini albums. I was on a roll last night and am now slightly ahead of pace, especially since there are two more completed layouts on my desk waiting to be photographed. :)
No comments:
Post a Comment